
Where are the text tools?
Open the screen in Replica Maker. If you have just converted screenshots to Replicas, the converted screens open in Replica Maker for you. Otherwise, go to your Learning Program's Screen Library, click the ... menu on the screen you want, and select Edit.
The two text tools sit at the left end of the Replica Maker toolbar: Text Extract (T with a dotted box) and Text Add (T with a plus sign).
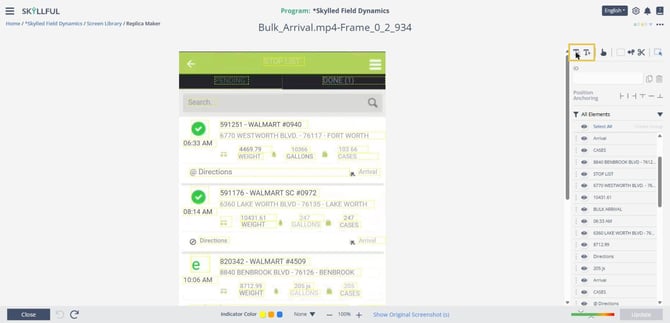
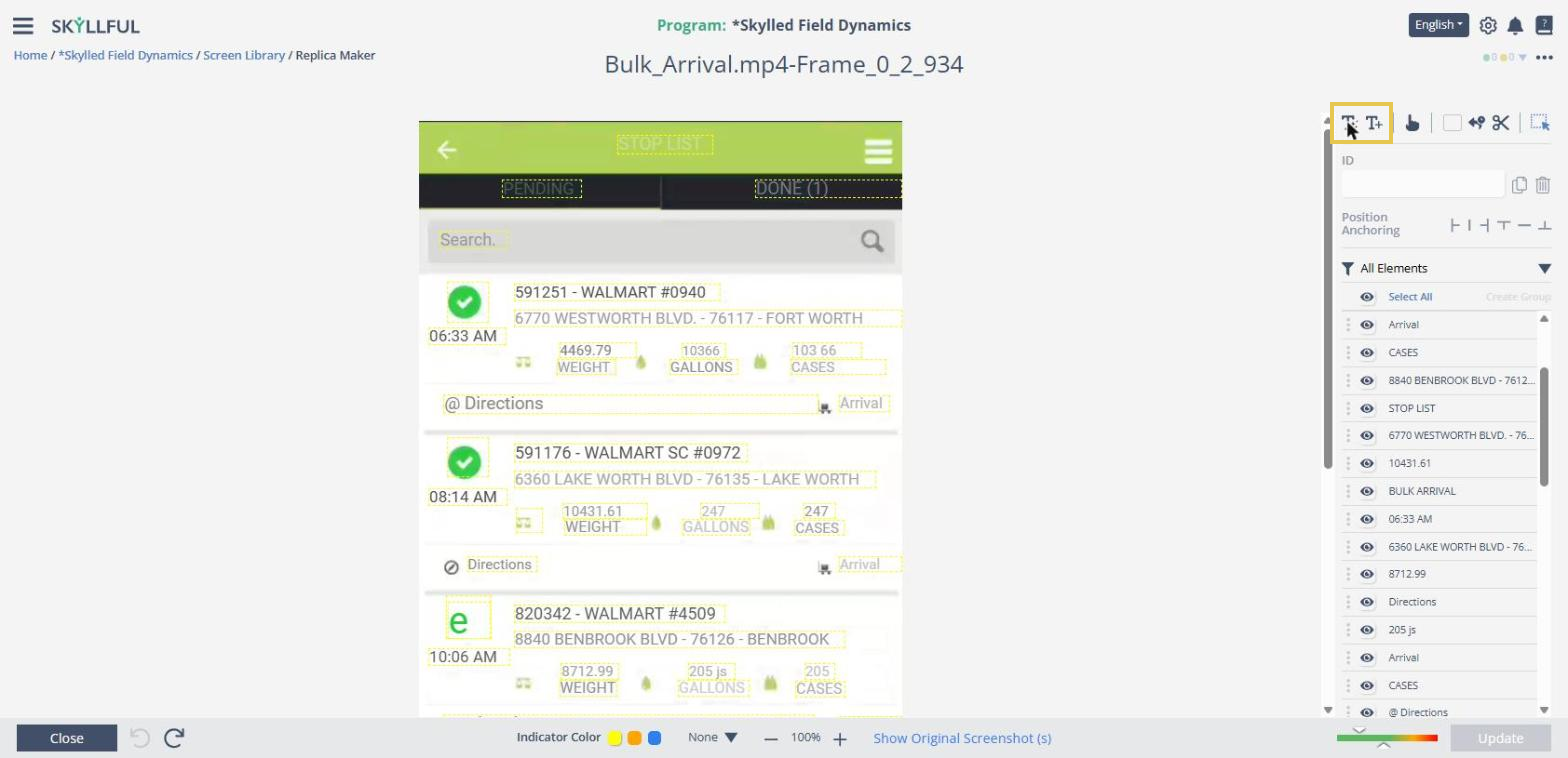
Text Extract and Text Add sit at the left end of the toolbar.
How do you turn image text into an editable element (Text Extract)?
A Replica is built in two layers. Conversion creates a fixed background image, then places named elements on top of it. Text that is still part of that background cannot be edited or translated, and it cannot be used as a control in a Lesson. Text Extract lifts that text out of the background and turns it into an element you can work with.
Step |
Action |
|---|---|
| 1 | Select Text Extract in the Replica Maker toolbar. |
| 2 | Click and drag over the text you want to convert. Skyllful reads the text and creates an element with the same wording. |
| 3 | Click the new element. The ID field and the Text Properties panel open on the right. |
| 4 | Check the Font setting and adjust the color, size, and alignment in Text Properties so the element matches the screen around it. |
| 5 | Click Update to save the screen, then Close. |
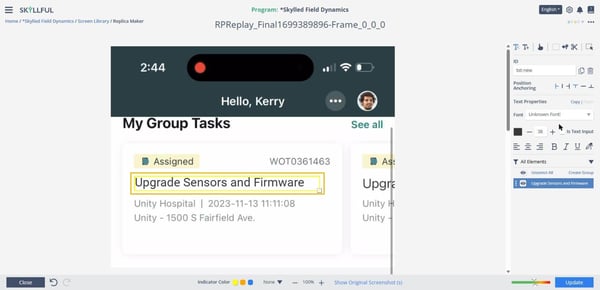
Text Extract creates a real element. Its ID comes in as txt-new and the Font often reads Unknown Font, which is why step 4 matters.
Note: The extracted text can look different from the screen it came from. Skyllful cannot always identify the original font, and when it cannot, Font reads "Unknown Font!" and a default is used. Set the font, size, and color yourself if the element needs to blend in.
Note: If dragging over text produces nothing, the text is probably already an element. Conversion extracts text automatically when AI Detect: Text is on, so on most Replicas the text you can see is already there in the All Elements list. Text Extract is for what the conversion missed.
How do you add new text (Text Add)?
Step |
Action |
|---|---|
| 1 | Select Text Add in the Replica Maker toolbar. |
| 2 | Click and drag over the area where you want the text. A New Text Line element appears and the ID field fills in with txt-new. |
| 3 | Double-click the element to edit it, then type your text. To replace the default wording in one go, triple-click it first to select the whole line. |
| 4 | Adjust the text in the Text Properties panel: font, color, size, alignment, bold, italic, and underline. |
| 5 | Click Update to save the screen, then Close. |
.gif?width=670&height=324&name=edit-text_text-add%20(1).gif)
.gif)
Text Add: drag where you want the text, then double-click to edit it. The recording starts with the screen already open in Replica Maker and stops before Update.
Note: The ID stays txt-new even after you change the text, so give the element a name of your own if you plan to reference it later. Keep the "txt" prefix.
What if you cannot edit text?
If the edit icons for a screen are greyed out, the screen is part of a published lesson and cannot be edited until that lesson is unpublished. Hover over the icon to see which lessons use the screen.
For anything else, contact your Local Administrator first. If your Local Administrator cannot resolve the issue, submit a case through the Skyllful support portal.
Skyllful Knowledge Base | Content Developers, Instructional Designers